PnP Powershell - for Sharepoint
Work is finally getting around to enabling OneDrive for Business (ODFB) for all our users. This is cool, because finally we'll be able to legit be able to collaborate on stuff - instead of this song and dance of save files to the network, wait for a lock to close and so on.
One of the things we ran up against is that when you share a file to someone through MS Teams, a copy is uploaded to your ODFB folder Microsoft Teams Chat Files. That's fine, except we have a legitimate concern that work will be done in this space, and not be captured in the correct locations for data.
We have a transitory network share that we had used when we were all working from home that could have suffered the same fate, except that we schedule it to be deleted every weekend.
Hard to work from a network location that gets purged at some regular frequency, right?
So, how do you do this with ODFB? I know it's backed by SharePoint, so the thought is that if I can manage a user's ODFB site through Powershell, I should be able to do the same batch deletion. Right?
Well, there SHOULD be a way...
V's Blog talks a bit about pre-provisioning a user's site with an existing folder structure, even including a sample script. Sweet!
It looks like it's referring to a set of modules called PnP-PowerShell which turns out it's been depreciated in favor of PnP.PowerShell. Ok? At least it's maintained, right?
So, the logic should be simple:
- Get a list of users who have a ODFB site.
- Give myself (my service account) access to the user's site
- Connect to the user's site, delete the content based on our criteria
- Remove rights from myself.
Additionally, if I can evaluate when the file was shared, I would consider extending the lifetime of the file before the content is removed. I'm not sure I can get this, but it's on the "nice to have" list.
The end goal will have this running as an Azure Runbook, so managing credentials a bit more effectively is a bit important here.
So, let's get going.
Powershell vs. Powershell Core
My initial design was to use Powershell Core (or, "powershell" instead of "Windows Powershell"), but one of the required modules isn't out for Core. I don't know if that's a "yet" or not, but since it's not in Core, I'm left with doing this in Windows Powershell.
Required Modules
Two key modules are in use here:
- PnP Powershell - https://pnp.github.io/powershell/index.html
- SharePoint Online - https://docs.microsoft.com/en-us/powershell/sharepoint/sharepoint-online/connect-sharepoint-online?view=sharepoint-ps
Installation of the two modules are straightforward:
1Install-Module -Name PnP.Powershell -scope CurrentUser
2Install-Module -Name Microsoft.Online.SharePoint.PowerShell -scope CurrentUser
Credentials
PnP Powershell will generate it's own certificate during the registration process, which we can also upload to a runbook down the road, so this is awesome.
The Sharepoint Online module requires ye olde username and password. It may be possible to automate this with an app registration, but I'll explore this down the road. For now, I know I can store credentials securely in Azure, so I'm only mildly concerned about this.
For testing... this is sufficient.
Initial module setup
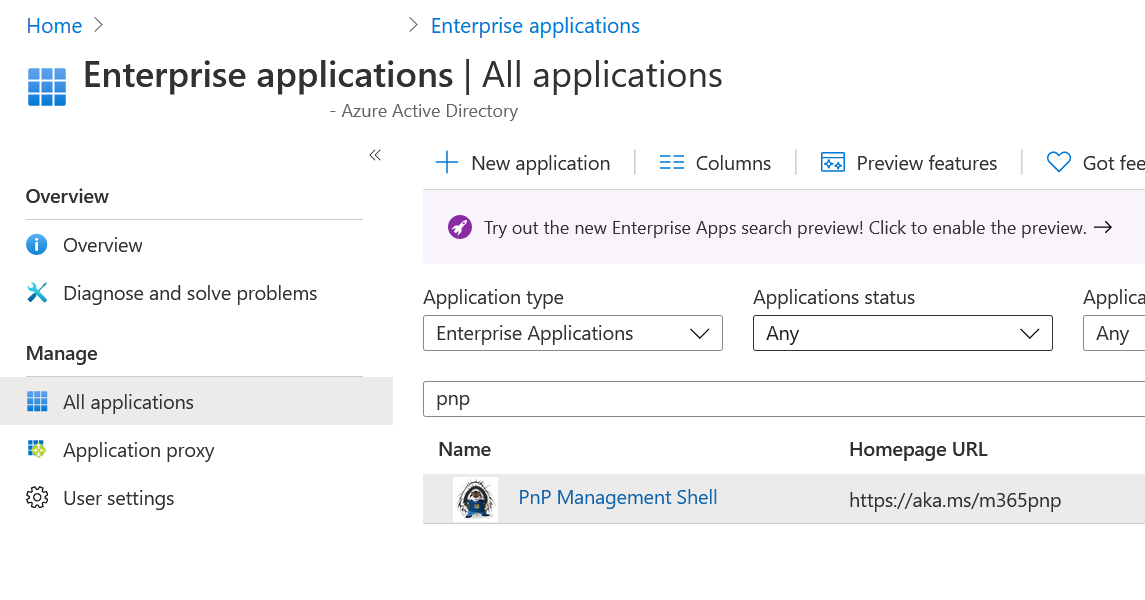
This module functions a bit differently than I'm used to, in that it installs itself as an app in my tenant. This requires some initial registration, which was easily done with Register-PnPManagementShellAccess.
The default behaviour opened the authentication in a browser window, but this gets my unprivileged Office 365 account. The console shows you the URL and device login code required to authenticate the application, so be sure to do so with an account with appropriate permissions. I'm using a Global Admin account, but there is likely a more suitable role.
The resulting registration shows up in AzureAD, under Enterprise Applications at https://portal.azure.com/#blade/Microsoft_AAD_IAM/StartboardApplicationsMenuBlade/AllApps/menuId/.

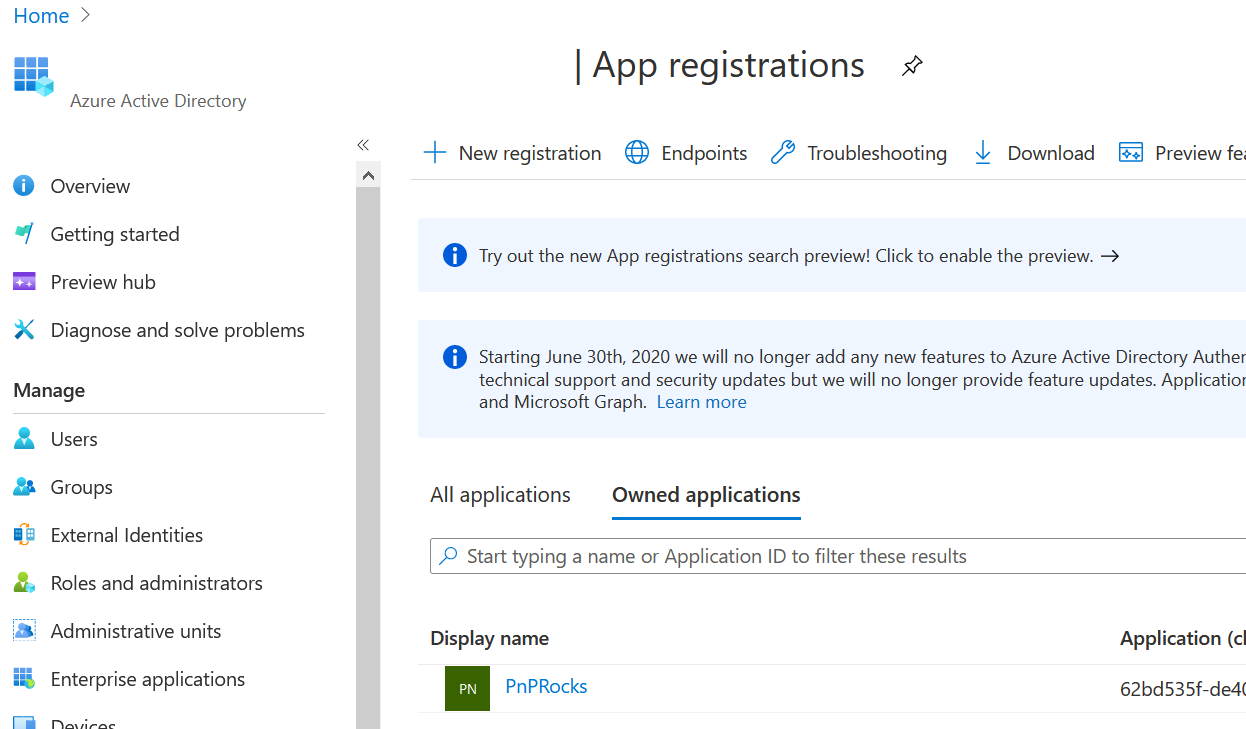
Next, I need to create an AzureAD Application (still not clear on actually what the differences between an Enterprise Application and an App Registration is, but ok..). PnP makes this easy, and even generates the certificates for you for your ongoing needs:
Register-PnPAzureADApp -ApplicationName "yourapplication" -Tenant tenantname.onmicrosoft.com -OutPath c:\mycertificates -DeviceLogin
You get the same consent workflow as when we initially ran register-PnPManagementShellAccess. Remember to open the link in a context that a user has access.
Next, the registration process waits 60 seconds to ensure that Azure AD catches up. I didn't get the "modern" device login prompt, and instead I keyed in my global admin user, password, MFA, etc.. and the AD App registration process finishes.
On my first go-round, I didn't fully read what the console was saying, and I thought I had to complete the registration within 60 seconds, and when it failed to complete correctly, I took a moment and actually read the prompts. Weird.
This app shows up in the "App registrations" blade of Azure AD, found here: https://portal.azure.com/#blade/Microsoft_AAD_IAM/ActiveDirectoryMenuBlade/RegisteredApps

What's generated is two certificate files (a PFX and CER) as well as a clientId. These are required for authentication. The ClientID can be retrieved from AzureAD App Registrations, however if the certificate is lost, a new one will need to be generated and uploaded to the App Registration.
That.. should be it.
Testing authentication
Connect-PnPOnline -Url https://tenantname.sharepoint.com -ClientID yourclientID -Tenant tenantname.onmicrosoft.com -CertificatePath c:\mycertificates\cert.pfx should.. do the trick.
Assuming no errors here, running Get-PnPList should return a list of Sharepoint sites. Neat.
Getting to the meat and potatoes of the script
So, I'm connected, but what I really want to do is connect to the personal sites of all my users to do some management. For that, I need to change my connect-PnPOnline parameters a bit, but before that, I need to get the PersonalUrl from Sharepoint. Before I do that, I need to make myself an administrator of my user's personal site.
It's about now that I figured out that I needed the -SPO* cmdlets, and thus Windows Powershell.
Step 1: Get User UPN's
I'm using email as UPN, but I do note that there's a userPrincipalName property available in Get-PnPUser. I note that it's also empty, so I'll stick with using my client's email address as the UPN. This may vary from environment to environment - I'm not entirely certain.
$userUPN = (Get-PnPUser).Email
Step 2: Get PersonalUrl's for ODFB
The key cmdlet here is Get-PnPUserProfileProperty. Things get a bit weird here, because the previous command will not be fully populated - there'll be blank lines. There will also be sites that aren't initialized, and some that are. I'm making my filter based off the following 2 URL's, specifically looking for /personal/.
1# This is a valid ODFB profile
2https://tenant-my.sharepoint.com/personal/u_name_domain_com/
3
4# This is not.
5https://tenant-my.sharepoint.com/Person.aspx?accountname=i%3A0%23%2Ef%7Cmem…
That bit of script looks like:
1$profiles = foreach ($user in $userUPN) {
2    if ($user.Trim().Length -gt 0 ) {
3        Get-PnPUserProfileProperty -Account $user | ? {$_.PersonalURL -Like "*/personal/*"}
4    }
5}
$profiles.PersonalURL generates a list of valid ODFB profile paths.
Step 3: Give my account access
At this point, we deviate from managing ODFB and start managing the underlying Sharepoint site. We are trying to grant my service account (my GA account in this case) permission to all user's ODFB site so that I can then explore the content within them.
As I've written this, I started in Powershell Core, but ran into the issue that the -SPO* cmdlets require Windows Powershell, so I don't have a complete script. The following snippet demonstrates the idea though: Once connected to Sharepoint Online, add your ID as a Collection Administrator to the user's site.
It should be trivial to figure out how to iterate over the data retrieved in the previous step to achieve this.
1$accountNameToAdd = whatever@tenant.onmicrosoft.com
2
3# Your GA username and app password you setup
4$creds = get-credential
5
6Connect-SPOService -Url https://tenant-admin.sharepoint.com -Credential $cred
7
8Set-SPOUser -Site https://tenant-my.sharepoint.com/personal/u_name_domain_com/ -LoginName $accountNameToAdd -IsSiteCollectionAdmin $true
Now your admin account has full rights to the personal ODFB site of your users. Neat!.
Step 4: Go manage the content
Connect to the ODFB personal site with the URLs you extracted in step 2, using the Connect-PnPOnline cmdlet from step 1:
Connect-PnPOnline -Url https://tenant-my.sharepoint.com/personal/u_name_domain_com -ClientID yourclientID -Tenant tenantname.onmicrosoft.com -CertificatePath c:\mycertificates\cert.pfx
If it was successful, it doesn't tell you as much. However, get-pnplist yields considerably different data, and if you expand your window a bit more, the URL shows you as much.
Trying to list files, Find-PnPFile -Folder "Documents/Microsoft Teams Chat Files -Match * gets me a list of files in that particular folder. Neeat.
Final code...
Needs a bit of error checking and exception catching, but we wind up with something like the following:
 1function main() {
 2    # Connect to Sharepoint online
 3    $ga_connection = Connect-PnPOnline -Url "https://$($_SHAREPOINT_DOMAIN)" `
 4        -ClientId $_SAVED_CLIENT_ID `
 5        -Tenant $_TENANT_DOMAIN `
 6        -CertificatePath (join-path $_CERT_PATH $_CERT_NAME) `
 7        -ReturnConnection
 8
 9    $spo_profiles = [System.Collections.ArrayList]@()
10
11    $userUPN = (Get-PnPUser -Connection $ga_connection).Email
12
13    foreach ($user in $userUPN) {
14        if ($user.Trim().Length -gt 0 ) {
15            $spo_profile = Get-PnPUserProfileProperty -Account $user -Connection $ga_connection | Where-Object { $_.PersonalURL -Like "*/personal/*" }
16            if ($null -ne $spo_profile) {
17                $spo_profiles.Add($spo_profile) | Out-Null
18            }
19        }
20    }
21
22    # Uncommenting this causes Find-PnPFile to error
23    # $spo_profiles
24
25    # SPO Credentials
26    $creds = new-object -typename System.Management.Automation.PSCredential `
27        -argumentlist $_SPO_ADMIN_USERNAME, $_SPO_ADMIN_PASSWORD
28    Connect-SPOService -Url "https://$($_SHAREPOINT_ADMIN_DOMAIN)" -Credential $creds
29
30    # Get access to SPO sites.
31    foreach ($spo_profile in $spo_profiles) {
32        try {
33            Set-SPOUser -Site $spo_profile.PersonalUrl -LoginName $_SPO_ADMIN_USERNAME -IsSiteCollectionAdmin $true
34        } catch {
35            write-warning "$($spo_profile.DisplayName) was not setup yet, so access was not applied."
36        }
37    }
38    #>
39
40    # Connect to that user's SPO site
41    $personal_site_connection = Connect-PnPOnline -Url https://cfer-my.sharepoint.com/personal/t_atlee_cfertech_com/  `
42        -ClientId $_SAVED_CLIENT_ID `
43        -Tenant $_TENANT_DOMAIN `
44        -CertificatePath (join-path $_CERT_PATH $_CERT_NAME) `
45        -ReturnConnection
46
47    $file_list = [System.Collections.ArrayList]@()
48    $file_list.AddRange((Find-PnPFile -Folder "Documents/Microsoft Teams Chat Files" -Match * -Connection $personal_site_connection))
49
50    write-host "File list:"
51    $file_list
52}
The rest is straightfoward: Check the content of $file_list for its age, and if it's suitably old, remove it.
Some gotcha's along the way
- As mentioned at the outset of all this, I found I needed to use Windows Powershell to do this instead of PSCore because the
-SPO*cmdlets are not available in PS Core yet. - While debugging, I had bits of output printed th the console, but the script would generate an error at the very end of execution, at the point of
Find-PnPFile. By removing the output, this issue went away. This issue has been discussed starting in 2017.
More work
A few more items remain outstanding:
- Getting the Sharepoint Online credentials managed a bit more effectively
- Getting this to run in an Azure runbook
- Exploring which files have been shared (see https://practical365.com/clients/onedrive/reporting-on-onedrive-for-business-shared-files/ and https://github.com/michevnew/PowerShell/blob/master/Graph_ODFB_shared_files.md)